Add a folder
Before you begin
Procedure
- In the Navigation block on the right, click on Courses.
-
Click on the name of the course to which you want to add a folder.
You will see the course page.
-
At the top right corner of the page, click on Turn editing
on.
Figure: Turn editing mode on
You will see the course page in editing mode. -
Click on Add an activity or resource at the bottom of
the topic section to which you want to add a folder.
Figure: Add an activity or resource
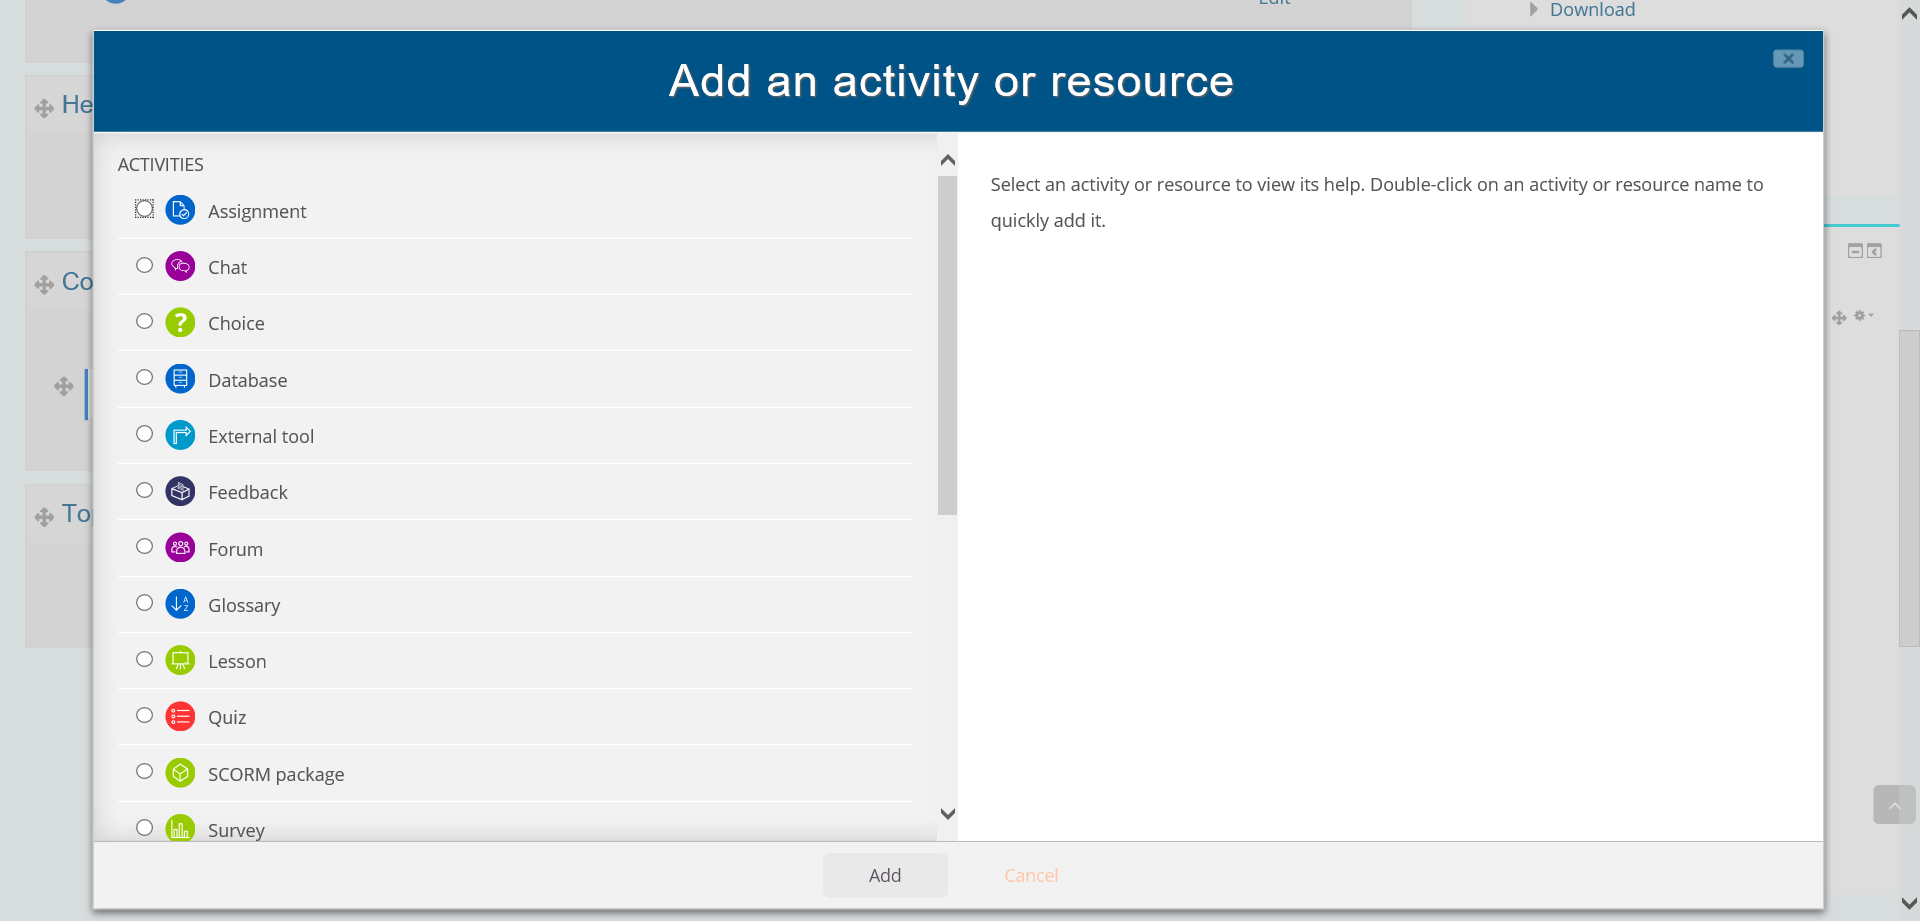
You will see the Add an activiy or resource window with a list of all available activities and resources.Figure: List of activities and resources

- In the new window, scroll down to the section Resources.
- Select the resource Folder
-
You can
- either click on the button Add,
- or double-click on Folder.
You will see the Add a new Folder page. - Fill in the required text boxes and options marked with an asterisk such as Name.
-
You may add a description.
If you want the description to be displayed on the course page, you have to tick the checkbox .
-
In the section Content, click on the Add file
icon next to Files.
Figure: Add file icon
You will see a window for uploading your folder. -
Click on Search.
You will see a window of your explorer.
- Click on Upload a file in the left-hand side menu.
-
Click on the Choose file.
Figure: Choose file
You will see your explorer window. -
Click on Open.
You will see the window for uploading again.
- Click on Upload this file.
- Keep all default settings in the sections Common module settings, Restrict access, Tags and Competencies.
-
To save the folder,
- either click on Save and return to course, which will lead you to the course page after saving,
- or Save and display, which will display the folder after having saved it
Results
You have successfully added a folder to a course.