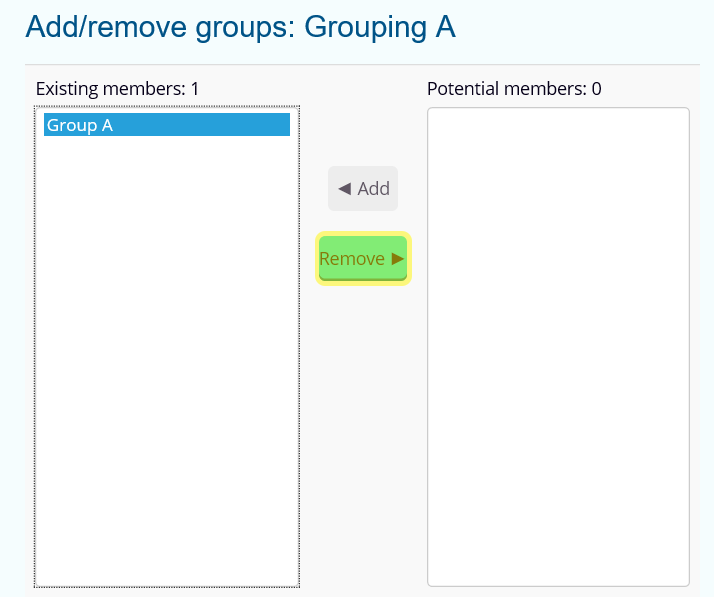
Remove a group

Before you begin

  • Make sure you are logged in as Teacher.
  • Make sure that you have opened the course from which you want to remove group(s) from the groupings.

Procedure

  1. In the Administration block, click on Users > Groups.
  2. Click on the tab Groupings.
    You will see the overview of the groupings.
  3. In the column Edit, click on the icon Show groups in grouping.
    You will see the screen where you can add and remove groups.
  4. Note:

    Please be aware that you can select multiple groups by pressing Crtl.

    Click on the group in the column Existing members to select the group you want to remove from the grouping.

    Figure: Screen for removing groups

  5. Click on Remove.

Results

The group is no longer listed as a grouping member.